In this article:
How to stop a mailing in progress
Here's how to stop a mailing in progress:
- Go to your "Dashboard".
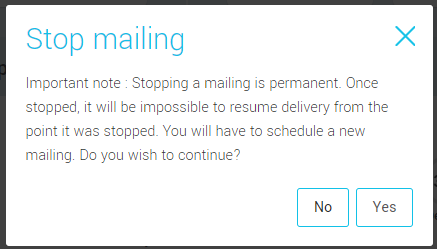
- At the right of the problematic mailing, in the “Mailing in progress” box, click the "Stop mailing" button.

- Click "Yes" to confirm.
Is it possible to get back delivered emails?
It's simply impossible to retrieve emails once delivery has started.
Q: Even If they weren't opened?
Answer: Even if they weren't open, getting them back is unfortunately impossible.
We recommend that you send out an erratum to people who received the wrong version of your email, depending on the severity of the typo or mistake. You can simply send the correct version to the recipients who didn't receive the wrong version of your email, so that they'll never know a mistake was made.
How can I send an email to people who didn't receive my first email?
There are two ways to create a group with these contacts and then send them a new email. Contacts who did not receive this mailing are those in the “Stopped” statistics.
- based on the statistics of the mailing you stopped
- from the statistics dashboard of the mailing you stopped
Here is how to proceed based on the statistics of the mailing you stopped:
- Click the "Mailings" tab, then "Previous Mailings".
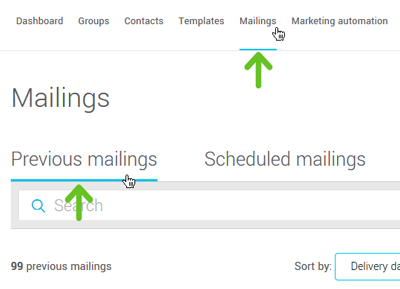
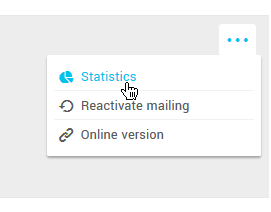
- Find the mailing you stopped in the available list and open the action menu by clicking the three dots on the right.

- Select "Statistics".
- Go to "Target groups" and select all groups or select the groups you wish to target.
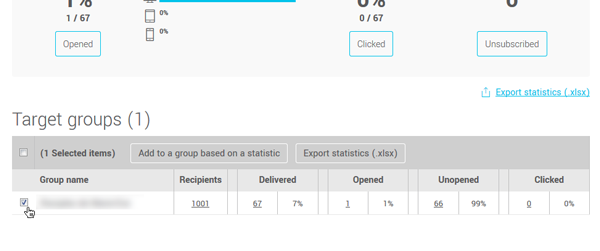
- Click the "Add to group based on a statistic" button.

- Select "Stopped" in the "Statistic" drop-down menu.
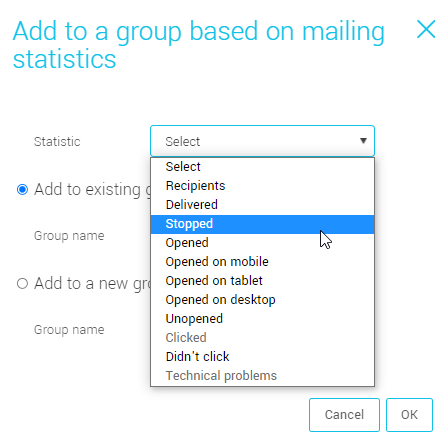
- Choose the option "Add to a new group" and name your new group.
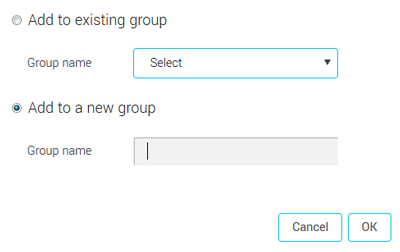
- Click "Ok" to confirm.
- Repeat the previous steps if needed for other mailing groups.
- All you have to do next is schedule your new mailing with the correction to your new group.
Here is how to proceed from the statistics dashboard of the mailing you stopped:
- Click the "Mailings" tab, then "Previous Mailings".

- Find the mailing you stopped in the available list and open the action menu by clicking the three dots on the right.

- Select "Statistics".

- Click the number on the left of the "Stopped" statistic.
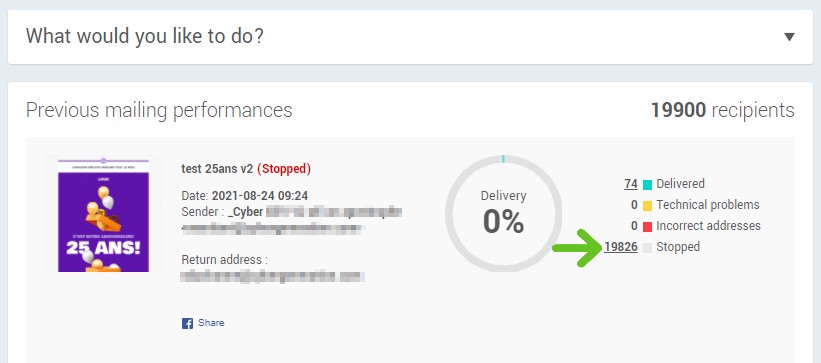
- Click the box to select all the contacts of this list and then click "Add to a group".

- Choose the option "Add to a new group" and name your new group.

- Click "Ok" to confirm.
- All you have to do next is schedule your new mailing with the correction to your new group.
What should I do for recipients who got the mailing with an error?
Really, the action to take depends on the severity of the error. If the mistake is simply a typing mistake, it's sometimes better to just ignore it and not bring attention to it. If, however, it's a major mistake such as a wrong information or a broken link, you might want to quickly fix the error and send the correct information.
If you stopped your mailing, here’s how to target the contacts who received it to send them a new email:
- based on the statistics of the mailing you stopped
- from the statistics dashboard of the mailing you stopped
Here is how to proceed based on the statistics of the mailing you stopped:
- Go to "Mailings" and select "Previous mailings".

- Find the mailing you stopped in the available list and open the action menu by clicking the three dots on the right.

- Select "Statistics".

- Go to "Target groups" and select all groups or select the groups you wish to target.

- Click the "Add to group based on a statistic" button.

- Chose "Delivered" in the "Statistic" drop-down list.
.png)
- Choose the option "Add to a new group" and name your new group.

- Click "Ok" to confirm.
- Repeat the previous steps if needed for other mailing groups.
- All you have to do next is schedule your new mailing for your erratum to your new group.
Here is how to proceed from the statistics dashboard of the mailing you stopped:
- Click the "Mailings" tab, then "Previous Mailings".

- Find the mailing you stopped in the available list and open the action menu by clicking the three dots on the right.

- Select "Statistics".

- Click the number on the left of the "Delivered" statistic.
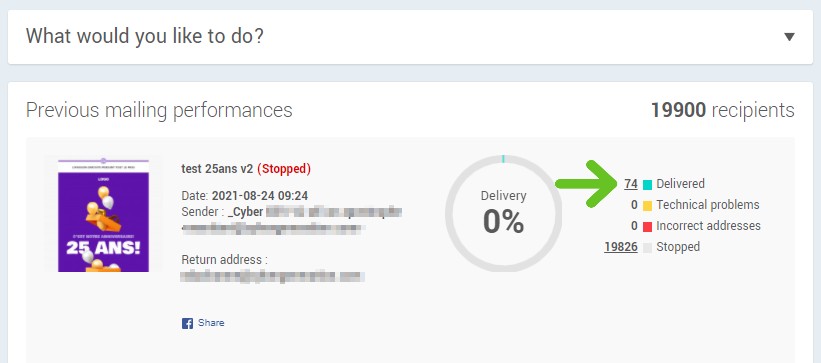
- Click the box to select all the contacts of this list and then click "Add to a group".

- Choose the option "Add to a new group" and name your new group.

- Click "Ok" to confirm.
- All you have to do next is schedule your new mailing with the correction to your new group.